Installing & Setting Up Protection
A step-by-step guide to enabling the Anti-Nuke protection system correctly the first time — including the one step most users skip: the bot's permissions.
Requirements Before You Start#
- The bot is already added to your server.
- You are the server owner, or listed in
Trusted Usersin the protection settings. - The bot has
Administratorpermission — or at minimum: Manage Roles, Manage Channels, Kick Members, Ban Members, View Audit Log, Manage Webhooks.
The most important step — don't skip it
If you only ever granted the bot permissions through its invite link, you're exposed to a real vulnerability: anyone who re-uses the bot's invite link (even while it's already a server member) and unchecks permissions on the consent screen — Discord immediately zeroes out the bot's auto-created role permissions, without changing its position in the hierarchy. Result: the bot looks "present and high-ranked" but is completely unable to protect anything.
The fix: follow the manual backup role step below — this is not optional.
Setup Steps#
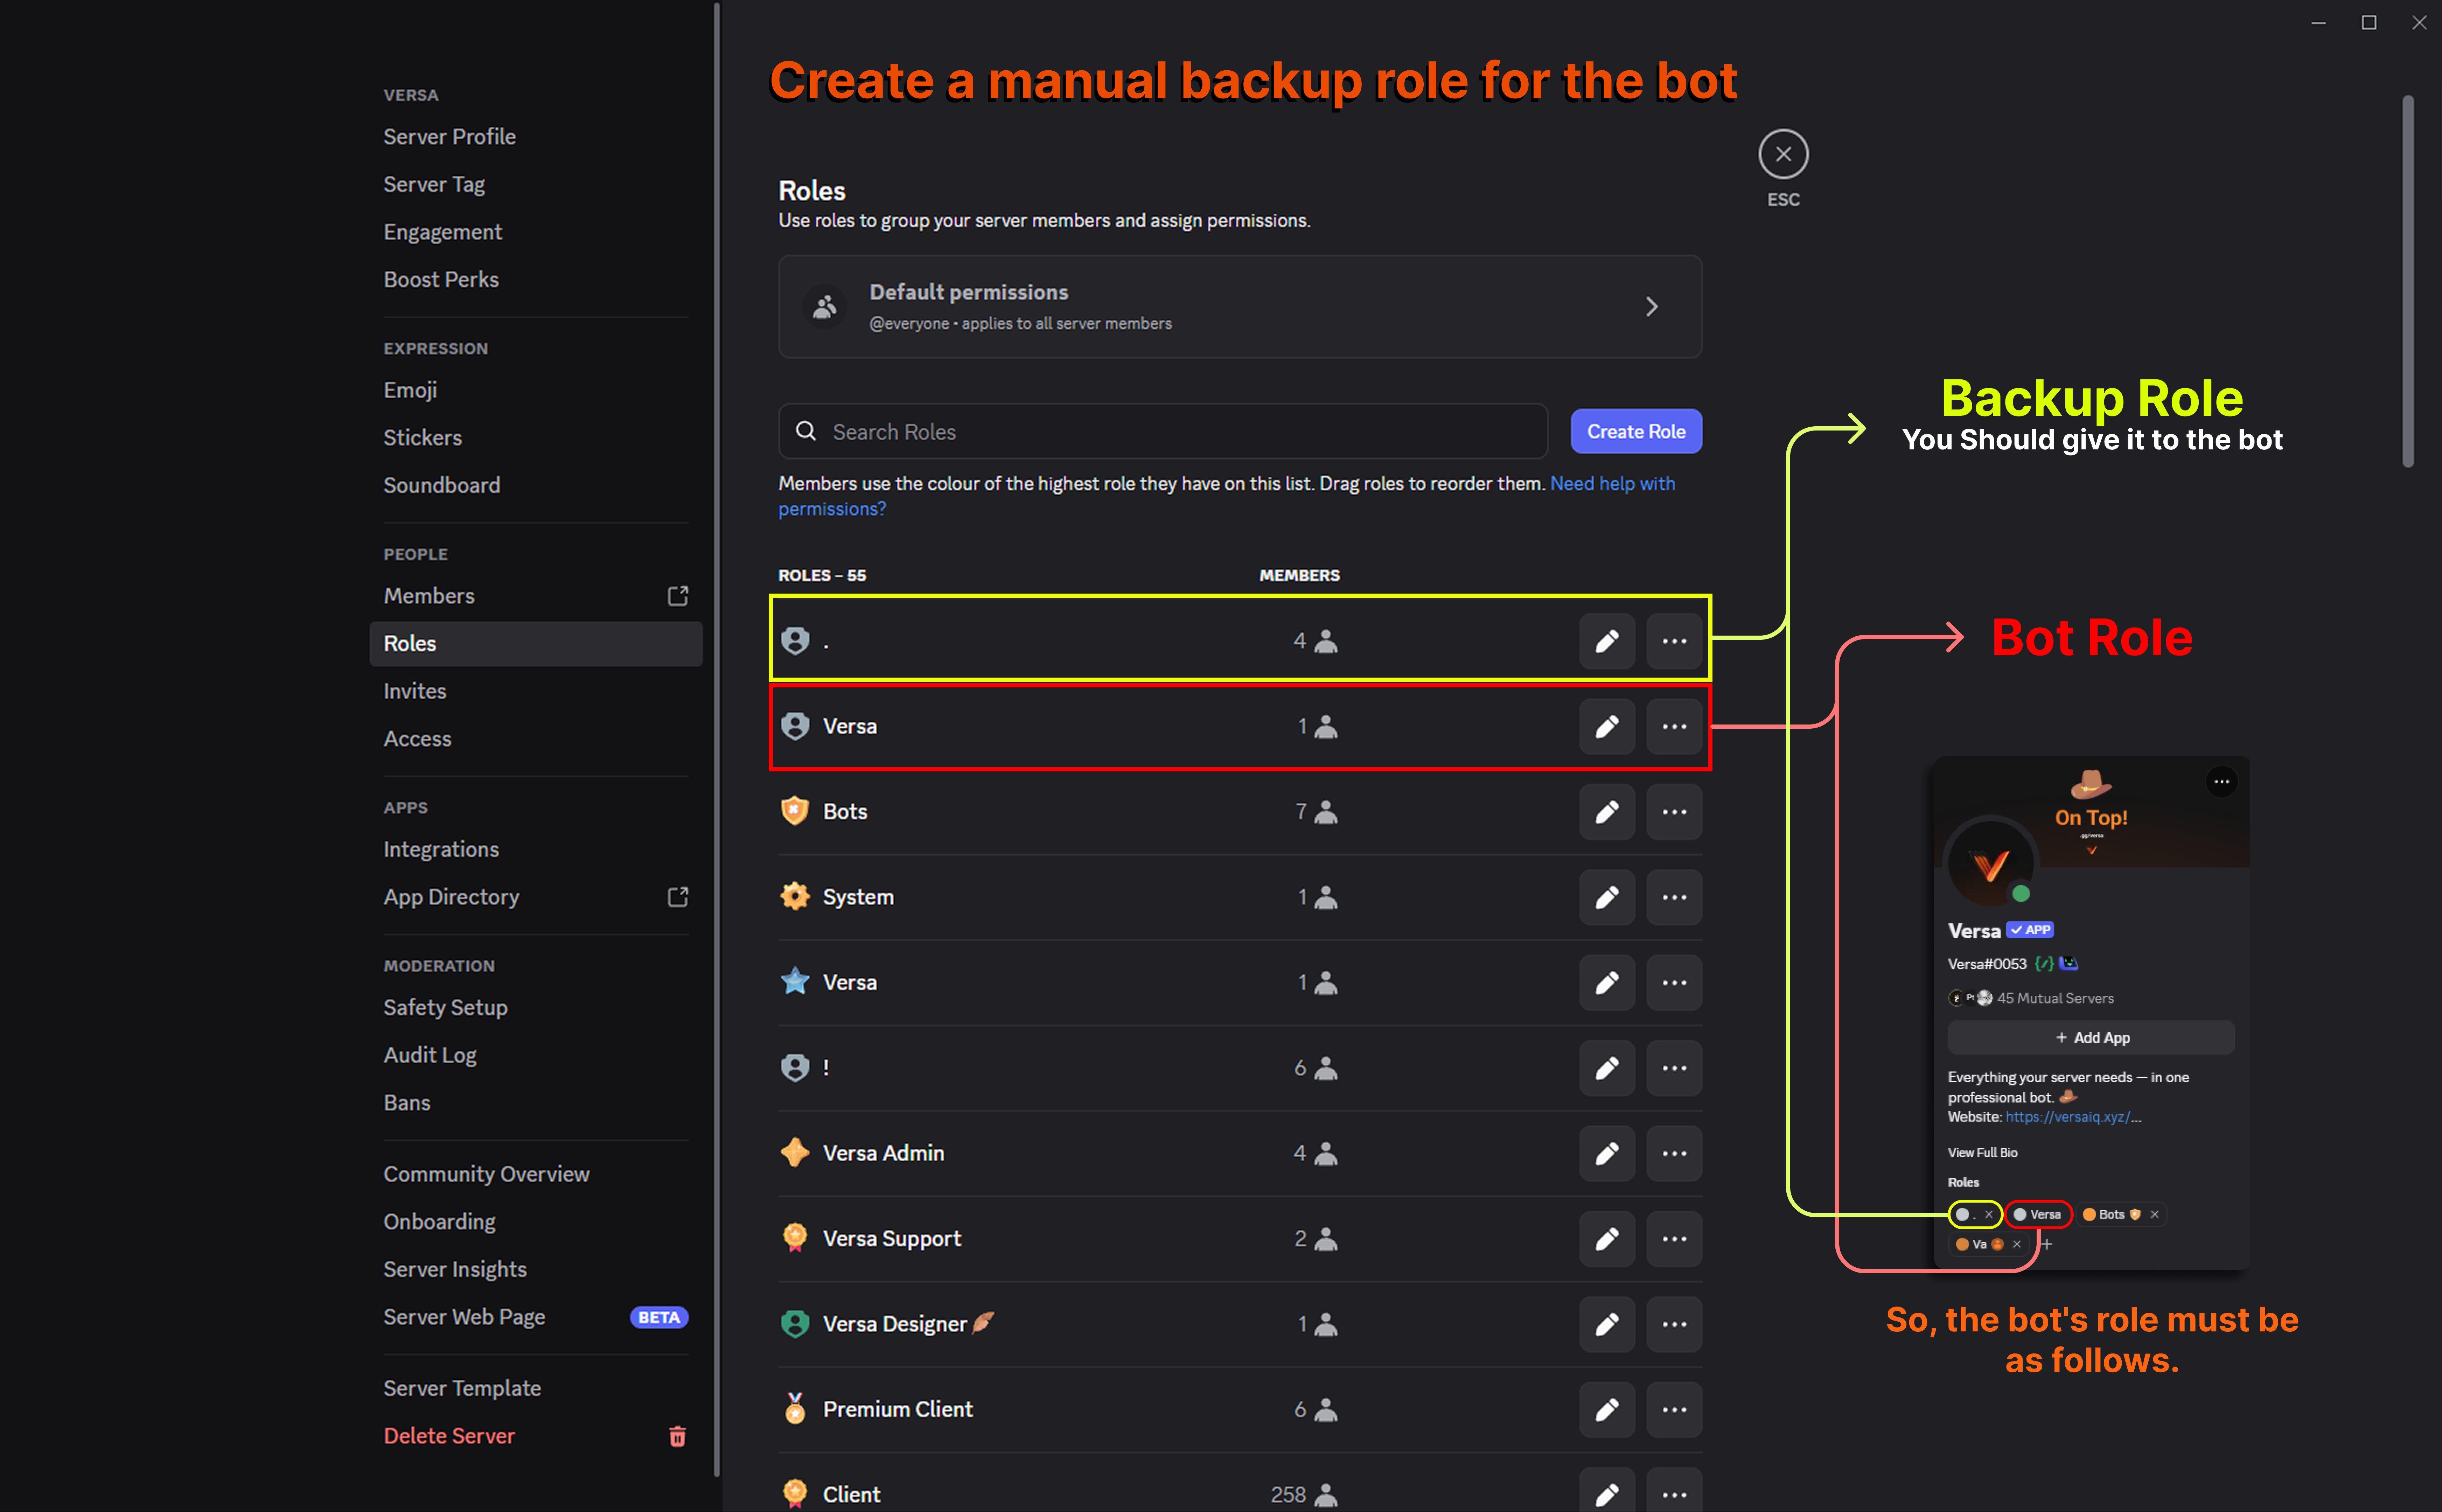
Create a manual backup role for the bot
From Server Settings → Roles, create a new role (e.g. named BotProtector):
- Give it
Administrator(simplest and most complete). - Position it strictly above the bot's auto-created role (the bot's own name) in the role list — below your own role only. This is required: the dashboard's automatic check rejects it as a "backup role" if it's positioned lower than the bot's auto role.
- Drag the bot into this role manually (or use a give-role command).
This role is completely separate from Discord's auto-created bot role — reusing the invite link does not affect it at all. Positioning it higher ensures the bot retains its ability to kick/ban/manage members even if the auto role's permissions get fully zeroed out.
Open the Protection page in the dashboard
From your server dashboard, open the Protection tab. You'll see an automatic warning at the top of the page if the bot still relies only on its auto role without a backup role — this confirms step 1 isn't complete yet.
Enable the global protection system
In the Anti Nuke tab, enable the Enable Protection System toggle at the top of the page. Without this global toggle, no individual protection feature will work even if enabled.
Enable the protection features you need
Choose the features that fit your server from the three sections (Limit & Punish, Instant Punishment, Detection Only). See How Protection Is Organized to understand the difference and when to use each.
Add Trusted Users
Add trusted admin accounts to the Trusted Users list — they're automatically exempted from all protection checks (they won't be mistakenly punished for performing legitimate admin actions quickly).
Set up log channels
From the Logs tab, pick a channel for Security Logs — you'll see every attempt the bot blocked there, including critical alerts (like the bot's own permissions being stripped).
Quick Checklist#
| Item | Required State |
|---|---|
| Manual backup role for the bot with full permissions | As high as possible in the hierarchy |
| Enable Protection System | Enabled |
| At least one Limit & Punish feature | Enabled (typically: Anti Ban, Anti Kick, Anti Channel/Role Delete) |
| Trusted Users | Contains all trusted admin accounts |
| Security Logs Channel | Set to a channel your admin team watches |
How do you know the setup is correct?
Open the Protection page in the dashboard — if no red or yellow warning appears at the top, the basic setup is sound. The bot checks this automatically every time you open the page.